A QUICK VISUAL GUIDE
Custom silicone logo patches: the process at a glance
Four steps at a glance. Explore the workshop process, then read the details below.
Watch: Silicone Patch Production in Our Workshop
See color dispensing, mold cleaning, white compound loading and finished patches. The heat-press machine is shown in a reference photograph.
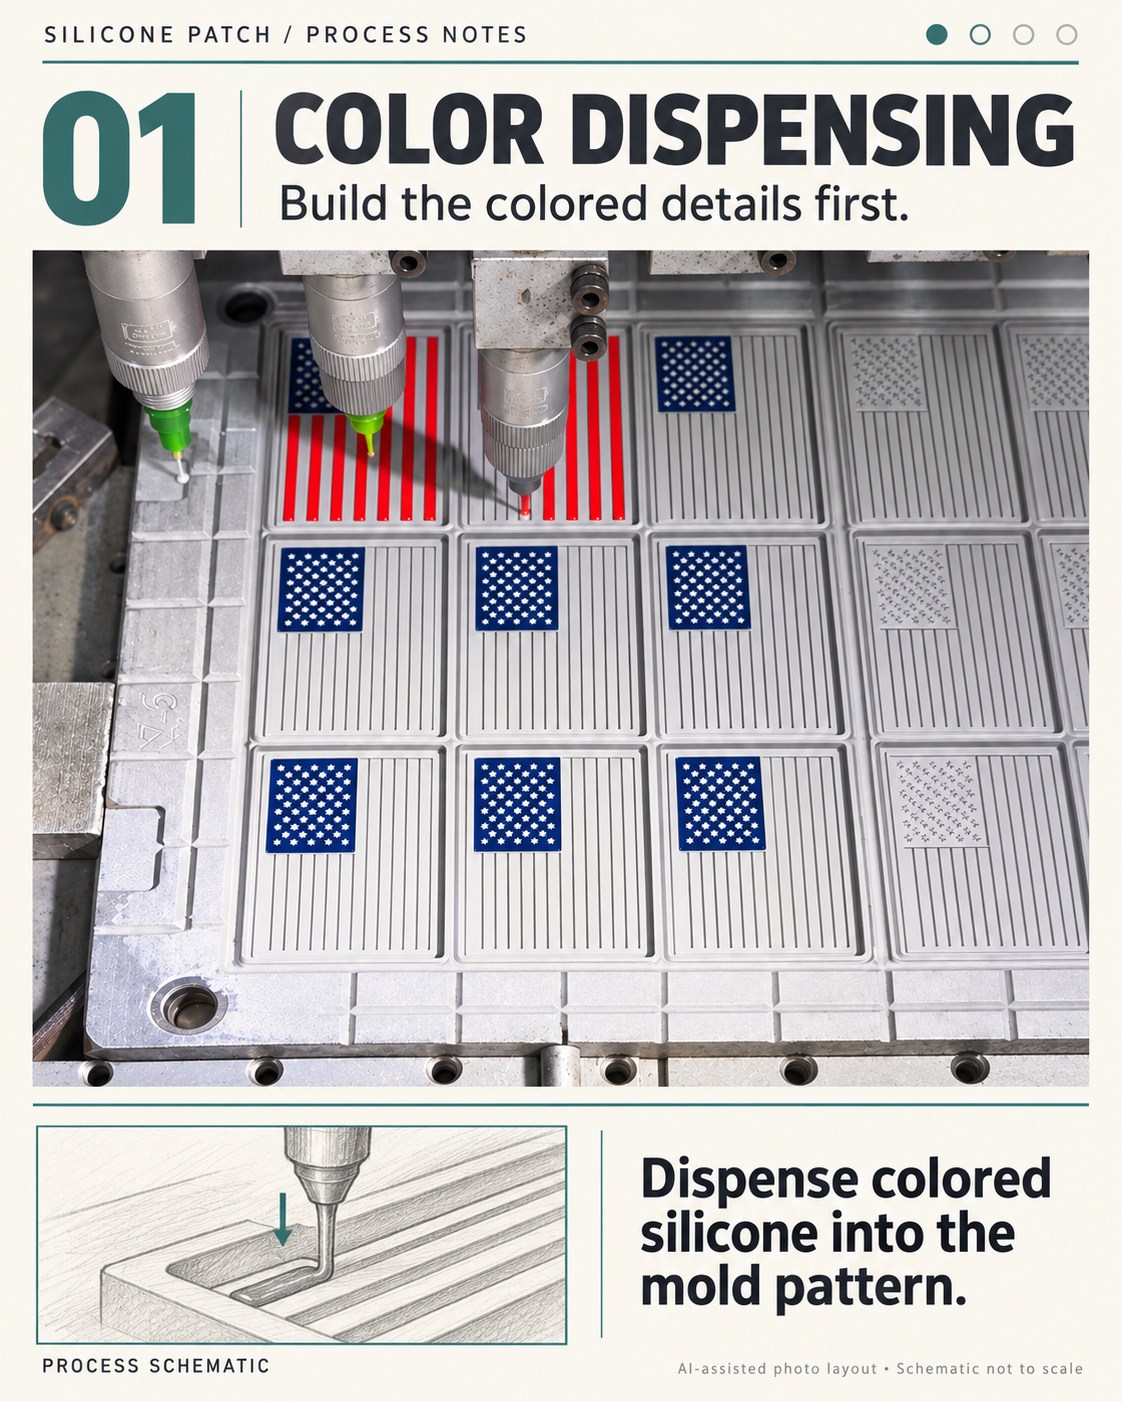
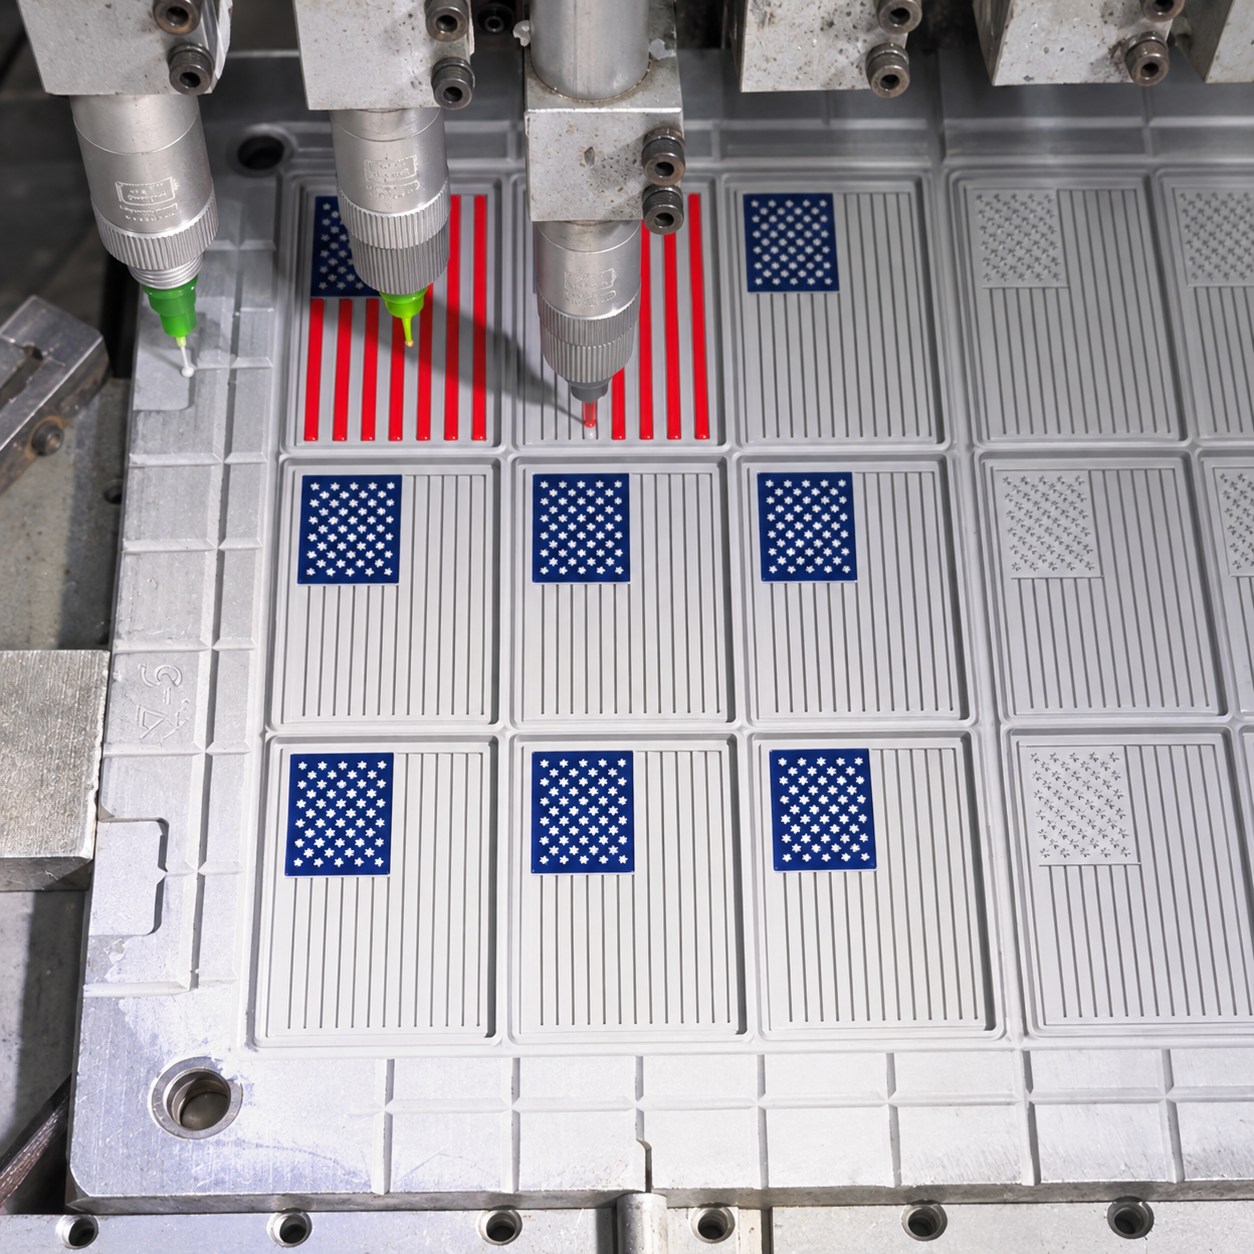
Dispense colored silicone into the mold pattern.
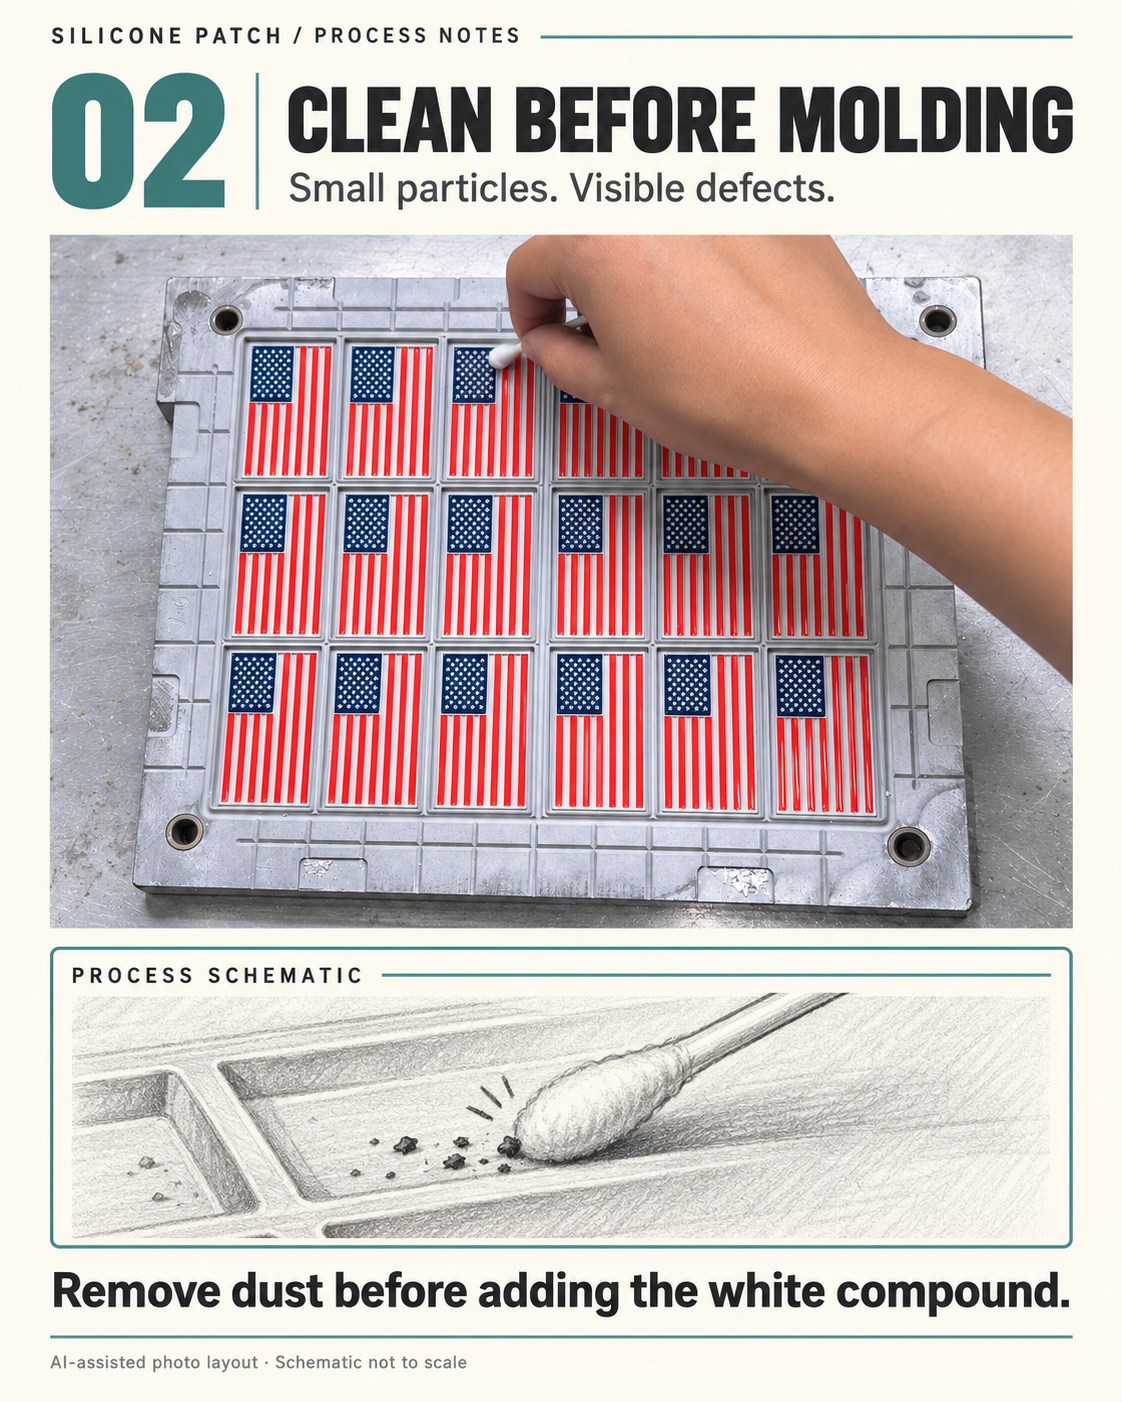
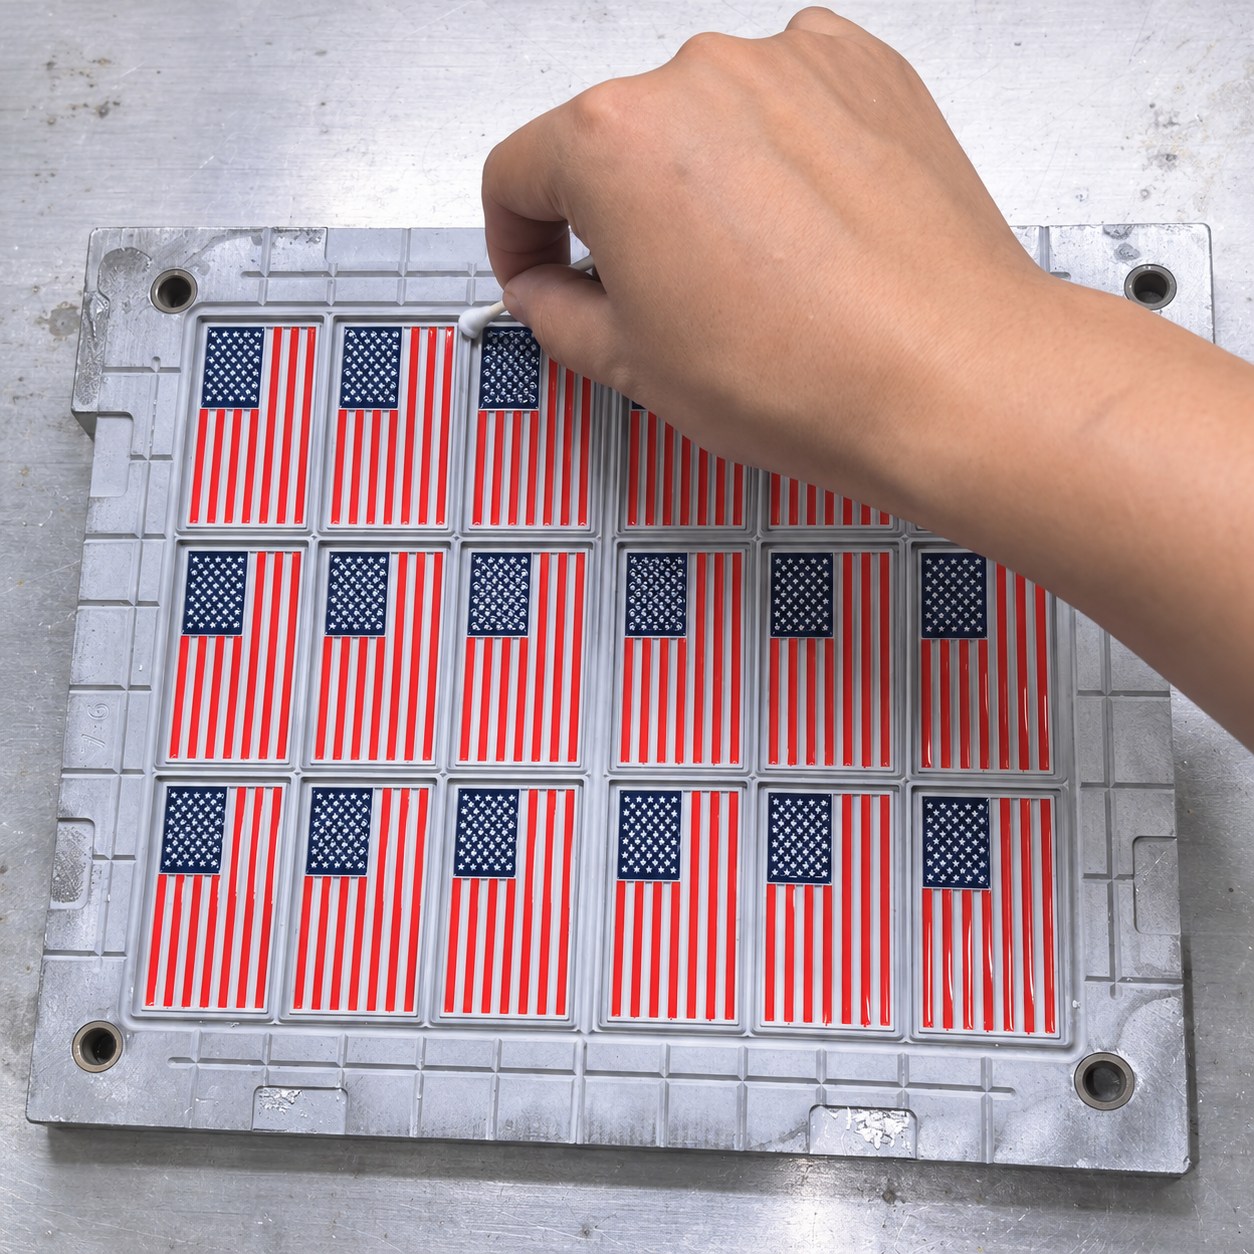
Remove dust before adding the white compound.
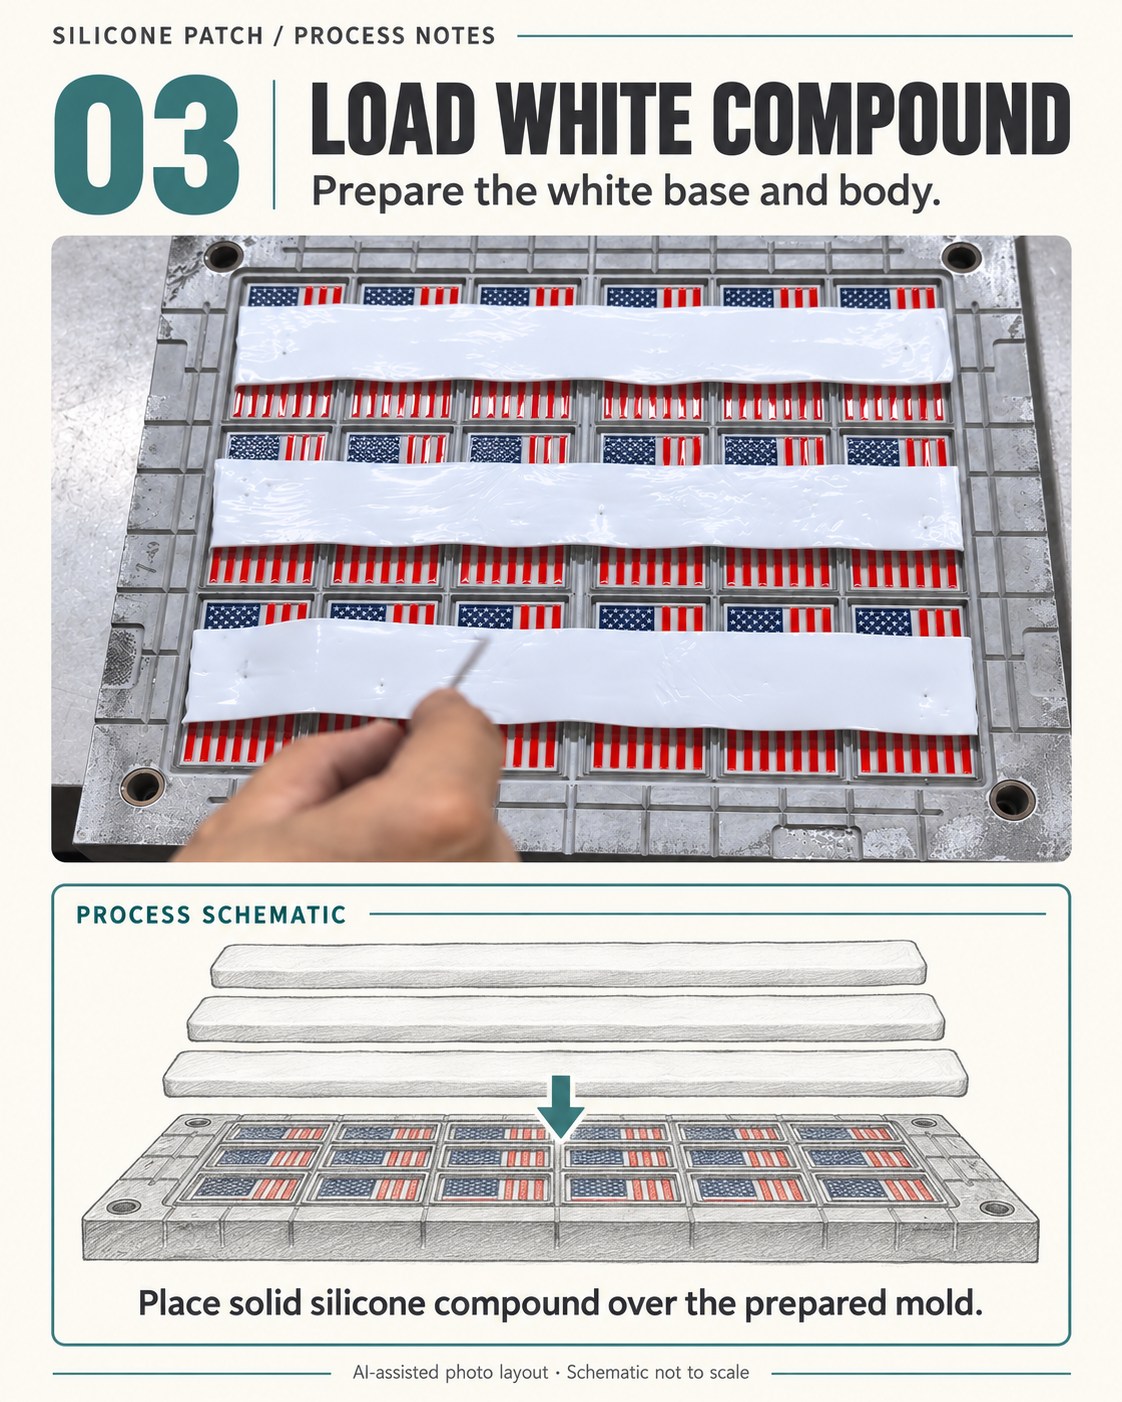
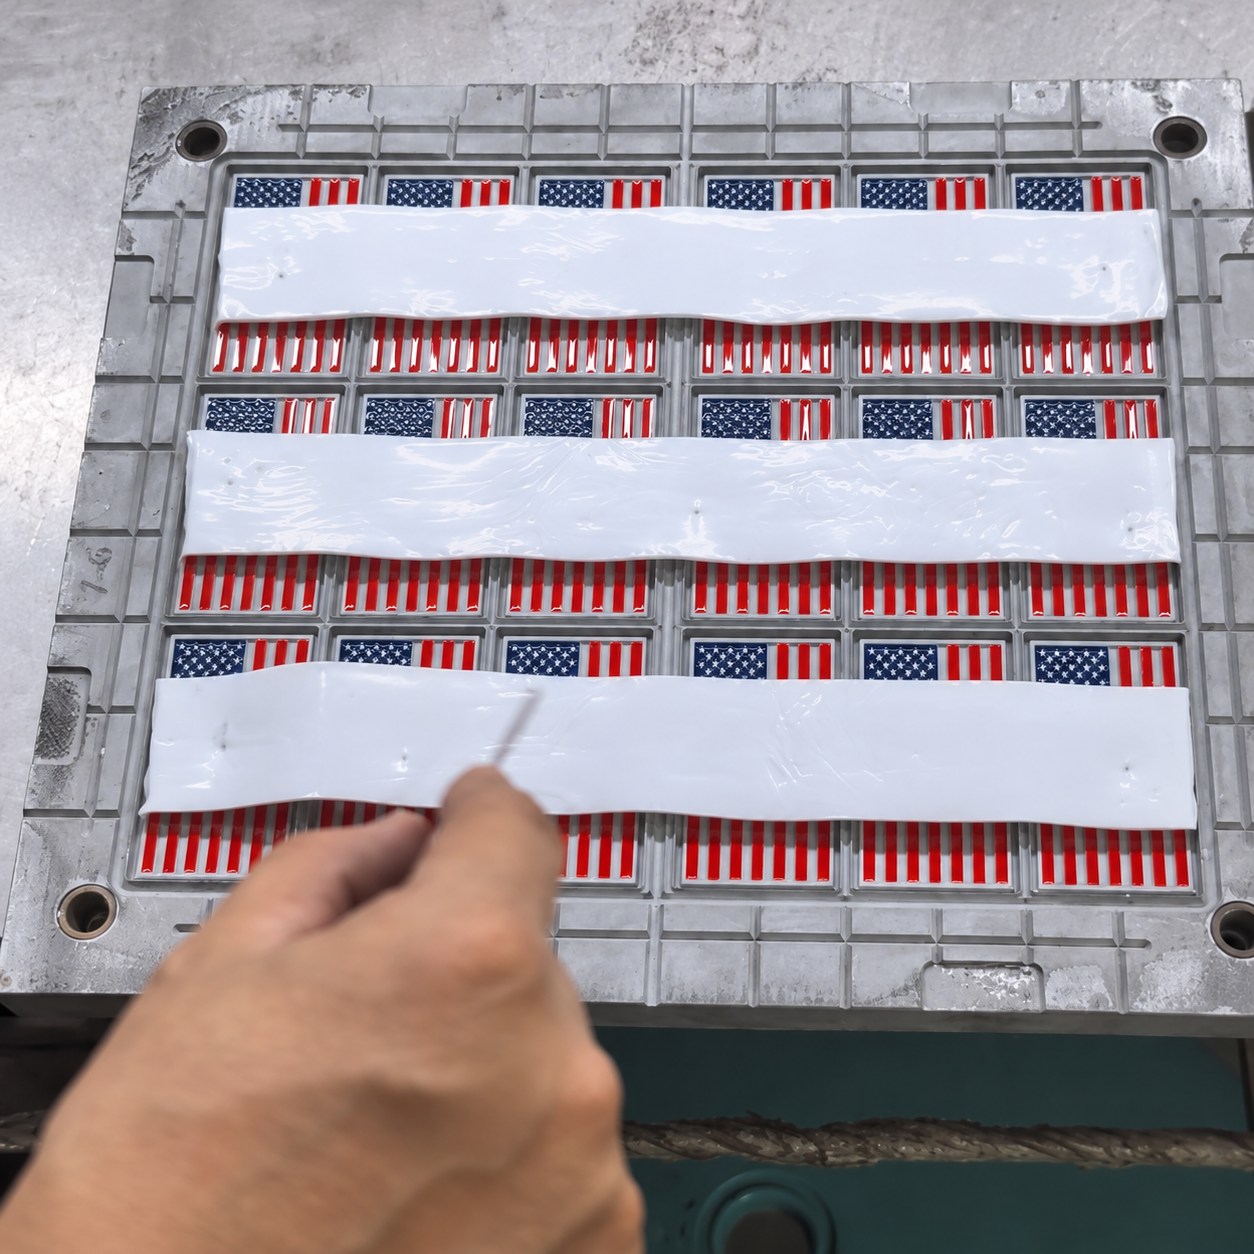
Place solid silicone compound over the prepared mold.
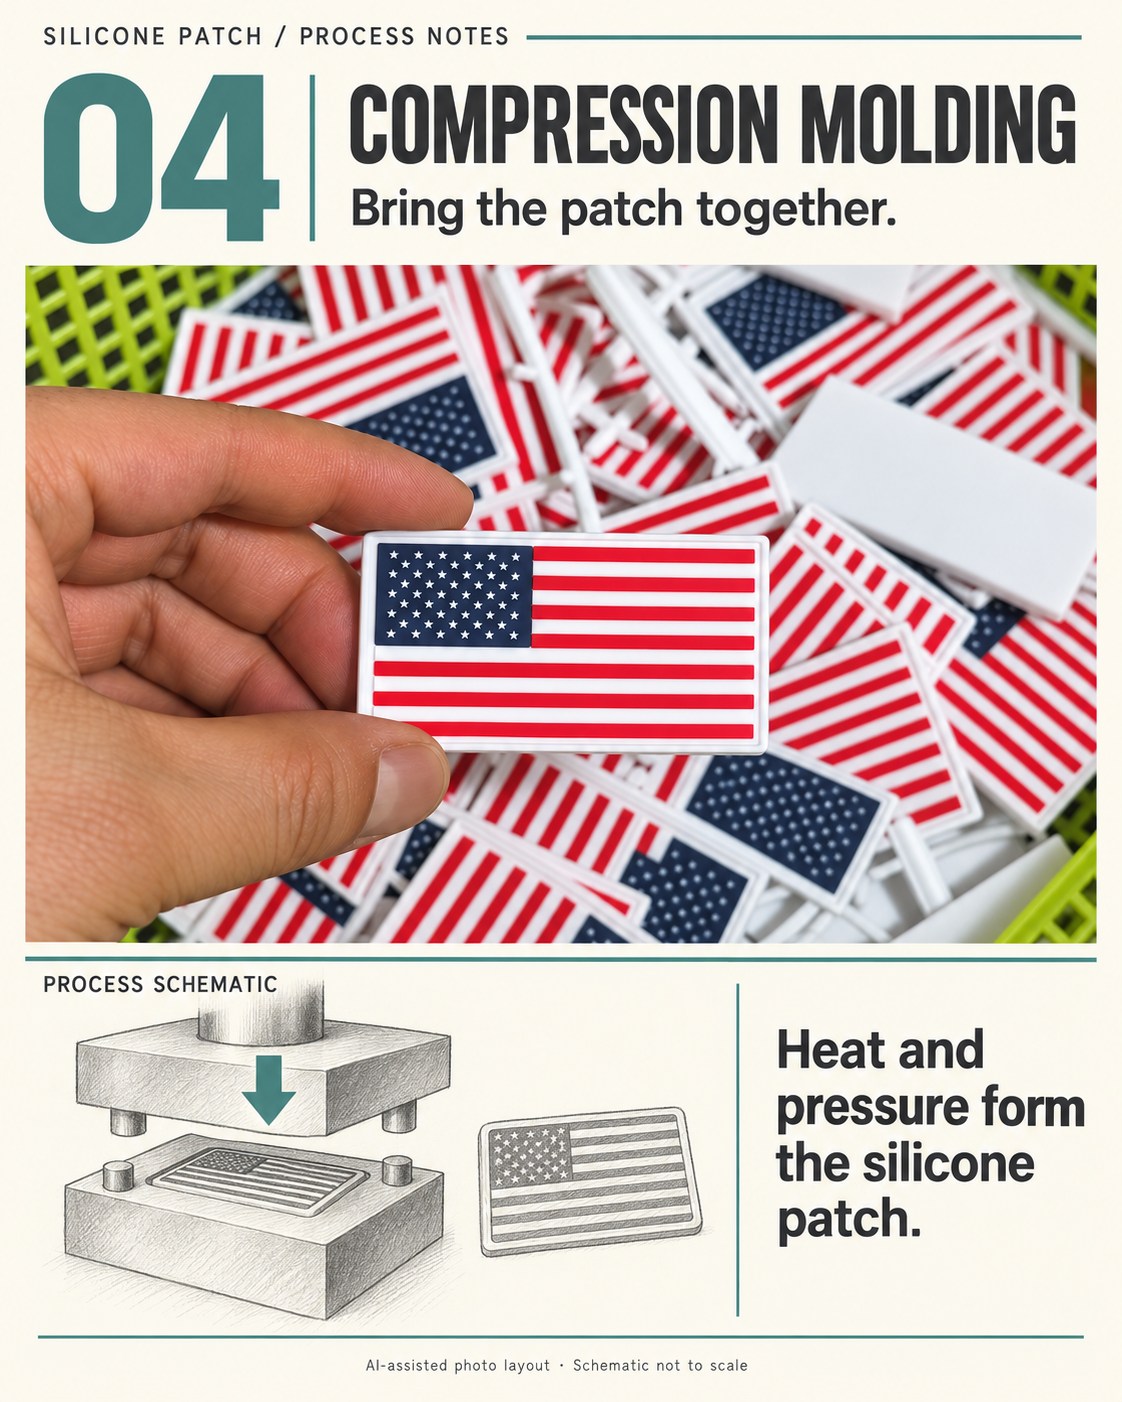
Heat and pressure form the silicone patch.
AI-assisted layouts based on workshop photographs. Sketches illustrate concepts, not exact tooling geometry. Fine visual details may differ from original photos.
How Custom Silicone Logo Patches Are Made: A White-Base Process Guide
Custom silicone logo patches combine colored artwork with a molded silicone body. This visual guide follows one white-base patch project, from color dispensing and mold cleaning to loading the compound and compression molding.
A small dark speck can stand out on a white silicone patch. In the production sequence shown here, cleaning is therefore a separate step between color dispensing and loading the white silicone compound—not just a final wipe after molding.
This example uses an American flag design to explain how colored details and a white silicone body are brought together. The process is based on our workshop’s description of this particular job; other designs may require a different sequence.
1. Silicone Patch Color Dispensing
The first image shows dispensing heads working over a multi-cavity mold. Colored silicone material is placed in the corresponding areas of the pattern. Some cavities already show colored details while others remain unfilled.
For a custom logo patch, this is where the artwork becomes a mold-based design. Before production, the artwork, color layout and small details need to be reviewed against the proposed size. A detailed drawing alone does not establish what the approved physical sample will look like.
2. Mold Cleaning Before White-Base Molding
After dispensing, the operator uses a cotton swab to wipe the relevant mold paths and areas that need cleaning. The purpose is to remove dust or dark particles before the white material is added.
If a particle becomes embedded in the white silicone during heat-and-pressure molding, wiping the finished surface may not remove it. This makes the pre-molding check important for this white-base design. Cleaning also needs to be carried out without disturbing the colored details already in the mold.
The photograph illustrates the operation; it is not a guarantee that every possible defect has been eliminated.
3. Load White Silicone Compound for Compression Molding
The next image shows strips of white silicone compound placed across the prepared mold. This material will form the base and body of the patch during compression molding.
The strips are solid compound, not a white surface coating applied to a finished patch. For this job, the colored mold details and the white compound are parts of the same manufacturing sequence. Material loading and molding conditions need to be set for the specific mold and product; this photo does not establish a universal temperature, pressure or cycle time.
4. Inspect the Molded Silicone Logo Patches
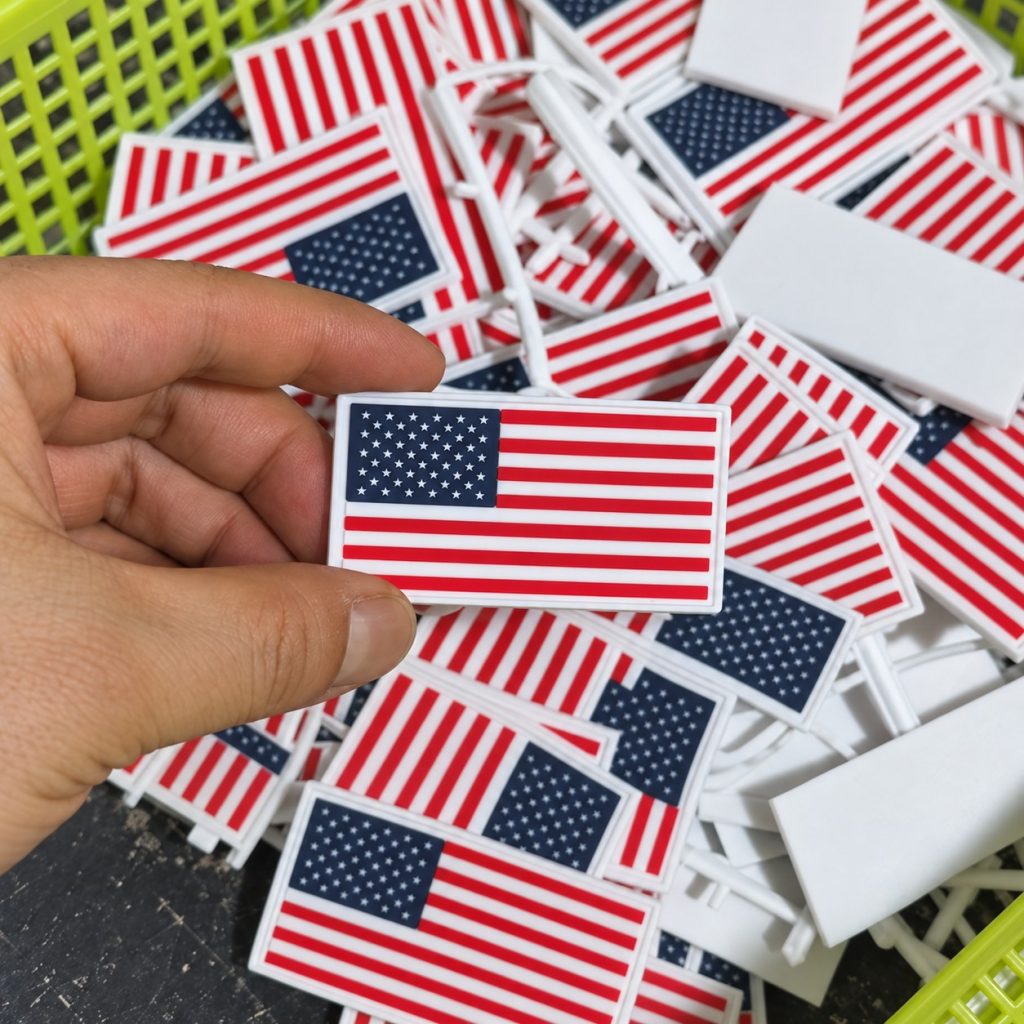
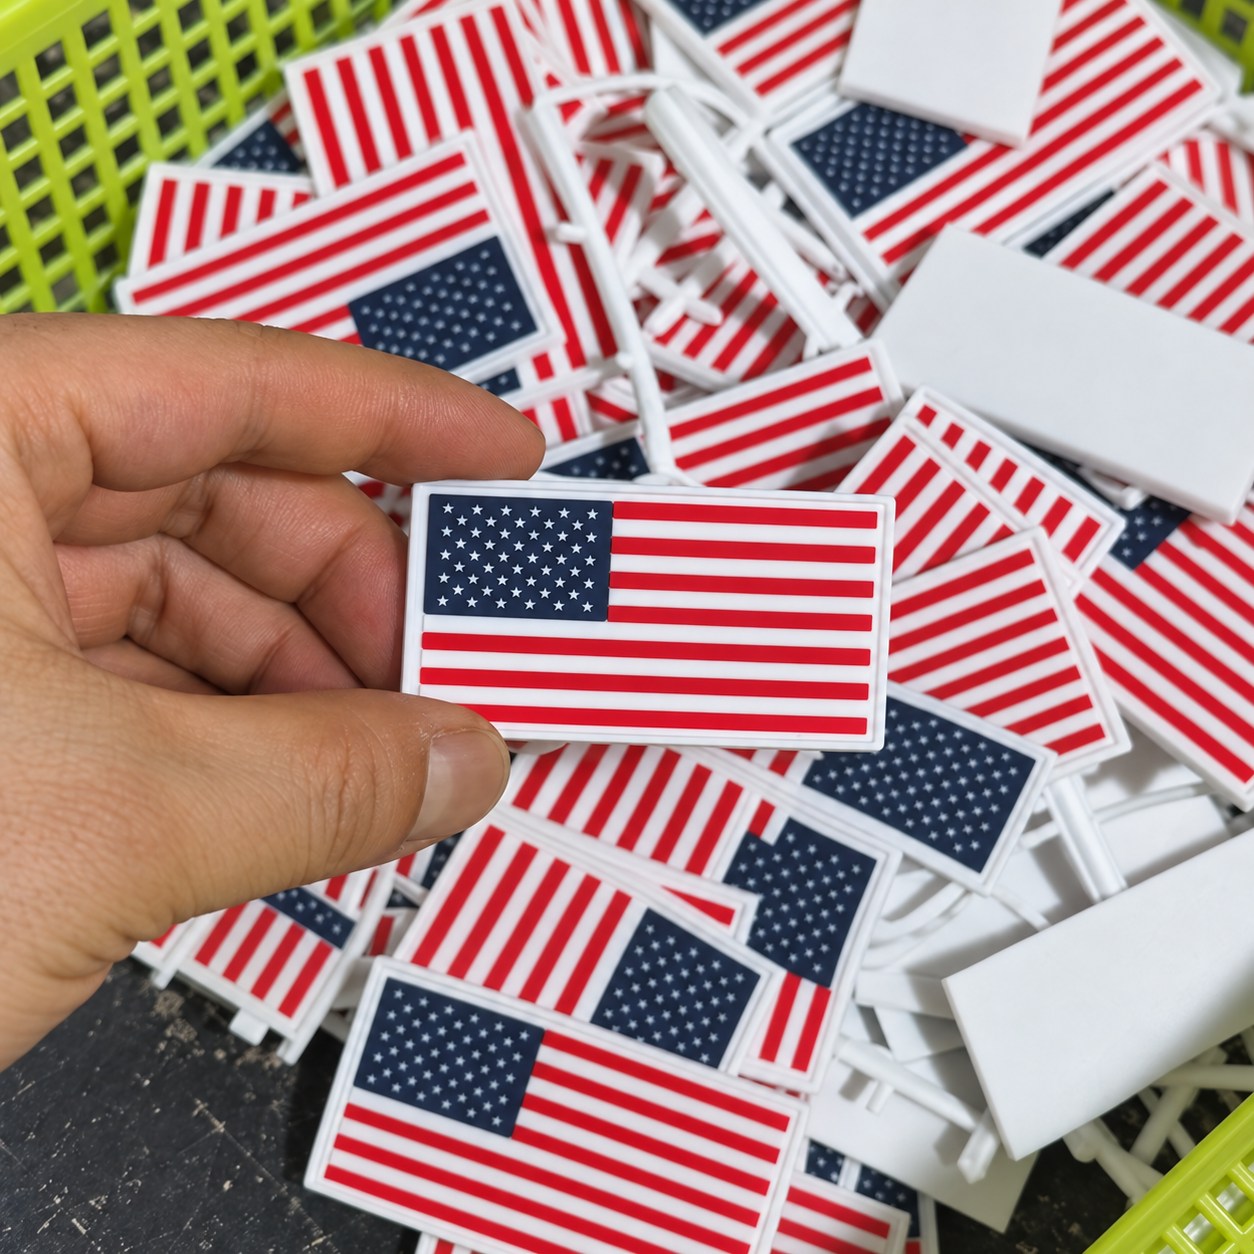
The final image shows the patches after heat-and-pressure molding, with colored flag details and a white body. It shows the molded result, not the complete final inspection or packing process.
For sample approval, useful checks include visible dark specks in the white areas, the clarity of the color boundaries, edge condition, dimensions and the agreed attachment method. These should be compared with the approved artwork and physical sample. A photograph cannot confirm wash resistance, bond strength or other performance requirements; those need separate agreement and appropriate verification.
Planning a Custom Silicone Logo Patch?
For custom silicone labels for clothing or a standalone logo patch, the intended use and attachment method should be discussed during sampling. Send your artwork or reference drawing, target width and height, intended use, color requirements, estimated quantity and preferred attachment method. If the design uses a white or light-colored base, flag that requirement during the sample discussion so the appearance checks are clear.
We can review the design and discuss a suitable sampling approach before production. Chat on WhatsApp to start a custom silicone patch inquiry.